Author Archives: Jay

Haulout 2012, Day Twelve

The novelty of this haulout thing has worn off and the days are running together.  Mudding and sanding, sanding and mudding.  Progress is measured in percentages.  

But the end is in sight.  Tomorrow we’re hoping to start the barrier coat.  It may reveal some spots that need more fairing, but I’m okay with that.  Just give me something I can check off the list.

The bridgedeck is still a question mark.  How long do we let it dry?  We’ve got 3,600W of lights pointed at it now, and it’s making a difference, but it’s slow.

The guy who runs the TraveLift here has been doing it for twenty-something years.  He’s very good at it.  Sure, he’s dropped a couple boats.  But how do you learn not to drop them if you never have, right?  So he’s the guy you want lifting your boat.  But he somehow got it in his head that boats must be blocked at a five degree incline.  I watched him block Take Two this way, and thought it was weird, but didn’t immediately see a problem.  Well, it’s been rainy recently and I can tell you, it’s a problem.  Think five degrees isn’t much?  Jack one end of your dining room table up six inches and see how you like that.  You’ll have gravy in your peas for sure.  God intended dining room tables and catamarans to be flat.  Anything else is just wrong.  

Apparently, Take Two’s port-side mast chainplates leak.  Thank you Billy, I never would have had the joy of discovering that if you hadn’t blocked my boat so they sat an inch deep in rainwater.

Haulout 2012, Day Ten

Let the record show it was Day Ten when I started losing my mind.  First we ran into a bad batch of fairing epoxy.  There was none good anywhere in town, so we had to have it shipped in from Miami.  Then the brand-new "heavy duty" air file (a pnuematic longboard) took a dump after only about 30 minutes of work.  Nope, can't get that locally either.  So we resorted to circular sanders, just to get something done.  This is the same tool we would have used to get the paint off in the first place if we hadn't used the fancy stripping process that took all our old fairing away.

To distract myself, I continue trying to figure out the bridgedeck.  I happened to have half a dozen 100W clamping worklights on the boat, specifically for drying out wet places.  I set those up on some of our worst spots to try and speed things up.  If that looks promising, I'll go get some 500W halogens.

The port stern repair is complete.  The starboard keel repair got done too.  We were able to cut away enough of the block to expose the damage without having to pick the boat up.

Haulout 2012, Day Nine

Who am I kidding?  We won’t be out of here in a week.  Fairing started today.  That’s going to be a slow process.  Then it gets two coats of barrier epoxy and three coats of bottom paint.

We took a bit more scientific approach to evaluating the water collected from bridgedeck.  We learned that all the water collected was indeed salty to some degree.  It ranged from 5,000 parts per million, which equates to mildly brackish water, all the way up to 1 million parts per million (salt crystals).  The darkest nastiest stuff was drained from under the generator space and actually contained oil.  

I think the salt water came in through the conduit system.  The watermaker is our only source of salt water and the conduit runs through a little sump area in that compartment.  I believe at some point the sump drain was plugged and salt water flooded into the conduit and then traveled all over the place.  The oil clearly seeped through the floor, and we have moisture in a couple other places where we've had standing water problems in the past.

The upside is that the water in the bridgedeck all seemed old.  If we can plausibly explain how it got there, and I think we’re close, then I can feel better that it isn’t going to come back.  The drain idea kind of died when I started to count how many I’d need.  Probably better just to go down there with a moisture meter whenever I start to lose sleep worrying about it. 

Haulout 2012, Day Eight

The family has left again for the next leg of their road trip.  This time down to the Keys.

The sanding of the bridgedeck is finally finished and we’re taking twice-a-day moisture readings to monitor drying progress.  We’re going to seal the wood, but first we want to make sure all the moisture is out. I’m beginning to wonder if this dry time might keep the boat in the yard for awhile.

Bridgedeck

Otherwise, things are going well.  We just crossed the 1-week mark, and it looks like we have a fighting chance at hitting our 2-week outside estimate.  There’s only one spot in the DIY area of the yard for a boat our size and it’s popular with catamarans, so running behind schedule would normally be a problem.  But we discovered awhile back that the woman who manages the boatyard schedule has a weak spot for Tanya’s cookies, and we began bribing her with goodies early on.  So when I asked for two weeks in the yard, she gave me four.  Maybe that was just pessimism on her part, but I prefer to think she was being nice.  In either case, we’re in no immediate danger of being rushed back into the water.  

The port keel repair is completed.  The jackstand damage under the port stern has been ground back, the broken planks cut out, and a piece of plywood chamfered in.

Haulout 2012, Day Seven

I had to go out of town today, so did not get to witness the draining of the bridgedeck first-hand.  I’m told it was impressive.  Not just the quantity of water, but also the variety.  Apparently it was a panoply of colors and smells.  The crew took pictures and saved samples for my later enjoyment.  Our human test kit reported that the brown liquids burn mightily in open cuts.  Interesting.  For my own sanity, I think we’re going to have to consider permanent drains in these areas.

Repairs of the port keel and stern were begun. There's an area on the bottom of the starboard keel that needs attention, but will have to wait until we shift the blocks.

Haulout 2012, Day Six

Sanding the bridgedeck continues, though today I did none myself.  The family was in town and I spent the morning at the beach with the big kids, where we got sanded ourselves.  The surf was up.  We had a serious talk about safety beforehand, and everyone did real well.  There were some scrapes and bruises, but it was great fun.  Alas, my phone has gone missing after several years of faithful service.  I think it swims with the fishes.

In the afternoon, Eli and I went to the boat and he helped me change the backstay chainplate bolts.  He had the inside job, which required crawling way back under the transom steps to tighten the nuts.  Kids are great for that kind of work.  Several of the old bolts had corroded and the heads broke off when I tried to remove them.  I’m sure the new ones are stronger, but I’m paranoid now that they might leak.

Holes from the removed thru-hulls and sonar transducer have been plugged.  Bad wood has been cut out around the cockpit drains.  Bootstripe has been cleaned in preparation for fairing the hulls.  That's going to be the next big job.

Haulout 2012, Day Five

Sanding overhead is a hard, messy job.  It is a painfully awkward position, and the machine has to be held – no, pressed – up to the work.  Depending on the machine being used, dust mask and eyewear is somewhere between a good idea for safety’s sake and necessary for survival.  My sander of choice is a Festool RO 150 FEQ, which puts me solidly in the survival category.  The thing is a beast and tears off paint at an incredible rate… if you can hold it up.  For every one minute I can hold it, I probably have to rest for two.

Now for the Surprise of the Day:  At some point in the last couple years, I noticed some hull damage on the inside of the port transom aft of the rudder.  The wood was broken, thrust upward like tectonic plates.  It was dry, so I assumed that whatever had happened, it had been repaired from the outside.  It wasn’t a high stress area, so I wasn’t too worried about it.  I repaired the inside to the best of my ability at that time, and promptly forgot about it.

But then during this haulout I noticed the spot looked a little funny on the outside, remembered my inside repair, and we decided to dig into it.  It turns out it wasn’t repaired from the outside at all.  I now think that a boatyard worker, probably at our last haulout, over-tensioned a jackstand and didn’t tell anyone.  The planks of the hull were broken, but the fiberglass skin held its shape, and the water out, for many hard miles.

Surprise of the Day

Another spot repaired at the same yard, where our keels were damaged while hauling out on their rail, we found was not done correctly and will have to be redone.

That was at a “full-service” yard, where I was supposed to turn over my baby and wait until they’re finished billing me.  They tolerated my daily visits, but I wasn’t allowed to do any work.  I had to rely on their personnel for everything.  It was not an experience I’m in a hurry to repeat.  

This time we’re at a yard that allows Do-It-Yourself work, and the difference is huge.  Nothing happens unless I do it or arrange to have it done.  I’ve hired a crew that I trust, and we work on the boat as a team.  Mistakes can always happen, but at least this time they’ll be my mistakes.

Haulout 2012, Day Four

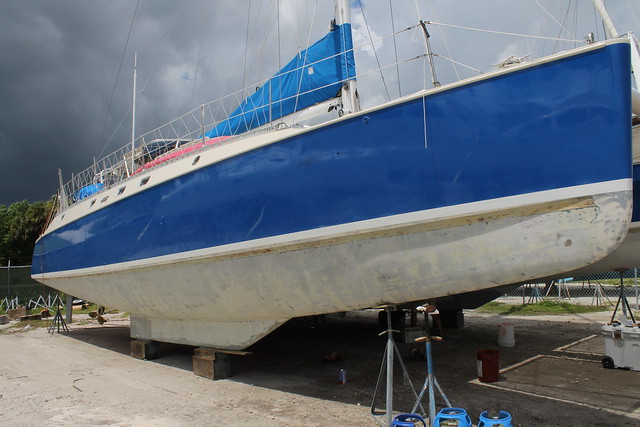
The main event for me today was the survey.  This is where a guy comes and inspects the boat to see that it is not likely to sink or burn, and is valued correctly.  Basically making sure it is a good risk from an insurance perspective.  From my perspective, it’s a trial.  This guy is coming to judge what I’ve done over the last four plus years.

It went pretty well.  I was concerned how he would react seeing the obvious moisture in the bridgedeck, but he was cool about it.  He spent about an hour tapping the boat with his phenolic hammer and pronounced it all sound.  His meter did not detect any undue moisture in the hulls, but the rudders pegged it.  He didn’t bother with the bridgedeck.  We were so distracted by the bridgedeck, we never tested the rudders.  Apparently, they’re full of water.  Which isn’t ideal, but it isn’t terrible either.  He said most rudders are.

He said that moisture itself is not a problem.  It’s only an indicator of a future problem.  As long as the hammer says the boat is solid, there’s no current problem.  Even the bridgedeck passed the hammer test.  Obviously, we’re concerned about future problems and are going to great lengths to fix the bridgedeck.  What will we do about the rudders?  Probably nothing.

The difference is that the rudders are full of salt water, which does not rot wood the same way fresh water does.  They’re also not dripping, which means whatever water is in there got in from the top.  Fixing it would require undoing the whole steering system and dropping the rudders.  Been there, done that.  No thank you.  There is a risk that the welds holding the rudder’s internal webbing to the post will break, but that risk wouldn’t go away even if we did rebuild them.

The surveyor was full of helpful anecdotes.  He said a catamaran came into that very boatyard about a year ago for a survey, and when they hauled the boat out of the water it only had one rudder.  The skipper was completely oblivious.

So after poring over the boat for four hours, the surveyor found two things I’d done wrong.  First, our propane stove does not have thermocouples to shut off the gas if the flame blows out.  I had no idea such things existed, and I’m still not sure if I can retrofit them.  Second, the galley outlets by the sink are not GFCI.  Yes, I suppose I should have known better there.  Interestingly, he had a tester for the GFCI outlets we do have, and we discovered they don’t work on our inverters.  Shore power, yes.  Generator, yes.  Inverters, no.

He found a burned-out navigation light and a smoke alarm with a dead battery.  I fixed both in his presence and he was satisfied.  He was not happy that my batteries are not strapped down.  Granted, this would be a legitimate concern on a monomaran that rolls all over the place.   But our boat would have to be completely upside down to budge them an inch.  I invited him to try.  They weigh 175 pounds apiece.

All-in-all, I consider the survey a huge success.

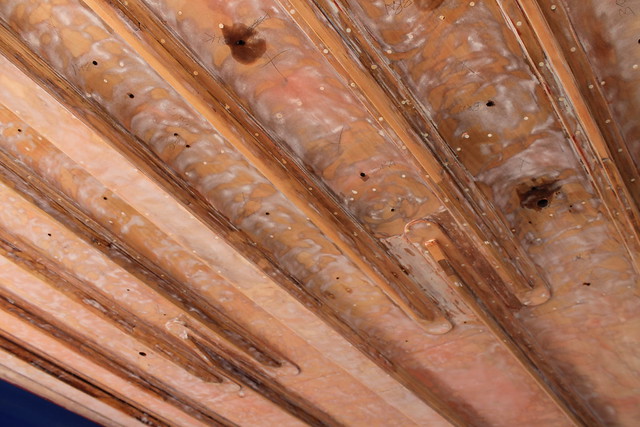
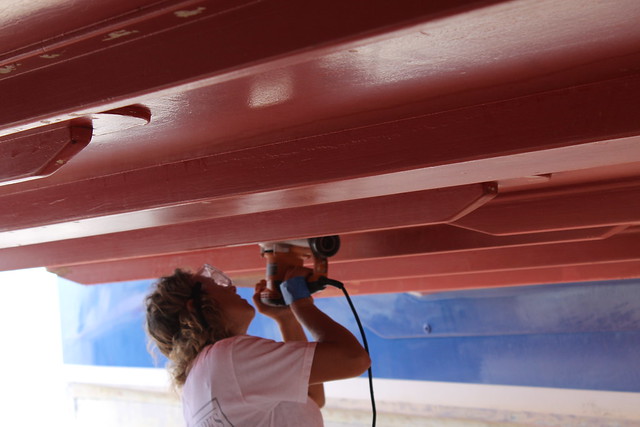
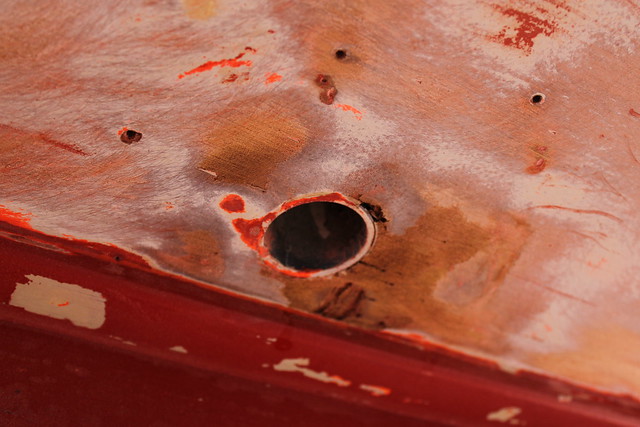
On the bridgedeck front, we have identified at least three separate sources for the moisture.  One is the cockpit drains, the bottoms of which are flush with the bottom of the bridgedeck.  The water has a tendency to spread out along the bottom of the bridgedeck rather than pour straight down.  Extending the drain pipes a fraction of an inch will help immensely.  We’ve already proven this during an afternoon thunderstorm.  Second are the fasteners (screws) which secure the bottom of the bridgedeck to the grid (in addition to copious amounts of epoxy).  However, the fasteners themselves were not epoxied.  They were screwed into raw wood, a filler was put over the hole, and then paint.  Not good enough.  Moisture permeated the paint and the filler to attack the wood through the screw hole.  The good news is that the moisture only appears to be in the surface layer of the plywood.  With the paint removed, it is drying before our eyes.

Drain You

The third source is more elusive.  A pattern of wetness is emerging that roughly coincides with where we have conduit running through the bridgedeck.  Conduit carrying fresh water hoses.  “Aha!” you think, “A leak!”  Not so fast.  One of our intrepid technicians inadvertently tasted the water when he drilled into a flooded cell and received a deluge in the face.  He declared it salty, and quite foul, many times actually, and loudly.  Hmm, we must ponder.  Meanwhile, the sanding continues.

Haulout 2012, Day Three

It only took two days before “the plan” went into the wastebasket.  

The bridgedeck is the span between our hulls.  It is a sandwich construction, with heavy beams running between the hulls and smaller pieces fore-and-aft to make a grid, and layers of plywood on the top and bottom.  We walk on it above, and the waves hammer it below.  Structurally, aside from the walking part, its job is to make sure the boat remains square, and that one hull doesn’t outrun the other one.

The paint on the underside of it has always been a problem, and with the repairs we had to do, I had half a mind to take it all down and repaint it.  Half a mind.  Notice I didn’t even mention this in the Day One post.

But on closer inspection, we found unsettling signs of moisture.  Moisture in boats is generally a bad thing, but especially wood boats prone to rot.  Like ours.  We put a moisture meter on it and found high concentrations of moisture in several different areas.  The paint was going to have to come off.

While stripping the hulls finished ahead of schedule, Eco Strip couldn’t do the bridgedeck.  There’s no fiberglass there, just wood and paint, and they were afraid of tearing up the wood.  So we’d have to do it the hard way.

The Hard Way

Yes, that’s a girl.  And yes, I’m slightly uncomfortable with that.  But she works like a horse.

It’s too early to tell what this means for our overall timeline.  After we’re finished sanding, we have to find the cause of the moisture, fix that, then repair the wood, then seal it all up and paint it.  

I’m taking suggestions for color.  I’m bored with the red and I’m thinking of something a little more fun.  I always joke that nobody but a helicopter pilot will ever see it anyway.  Maybe chartreuse?

So it’s a little bit of a bummer, but we expect the unexpected.  On the plus side, we’re going to fix the shit out of this.  Cuz that’s how we roll.  

Haulout 2012, Day Two

The first order of business once the boat was down on blocks, was to get the paint stripped off.  For this we contracted Eco Strip, a company that specializes in removing bottom paint.  They use what is essentially a warm pumice mud to blast the paint off the hull.

Getting Blasted

We budgeted four days for this process, but they brought two machines and got it done in a day and a half.  This is hands-down the fastest, most economical and environmentally-friendly way to get bottom paint off a boat.

No Pants!

What we’re left with is a little bit baffling.  It’s kind of like stucco.  We can clearly see it was put on with a trowel.  The stripping process removed whatever soft fairing was used, so we’ll have to re-fair it before we can barrier coat and paint.